Chord Progressions
1Key
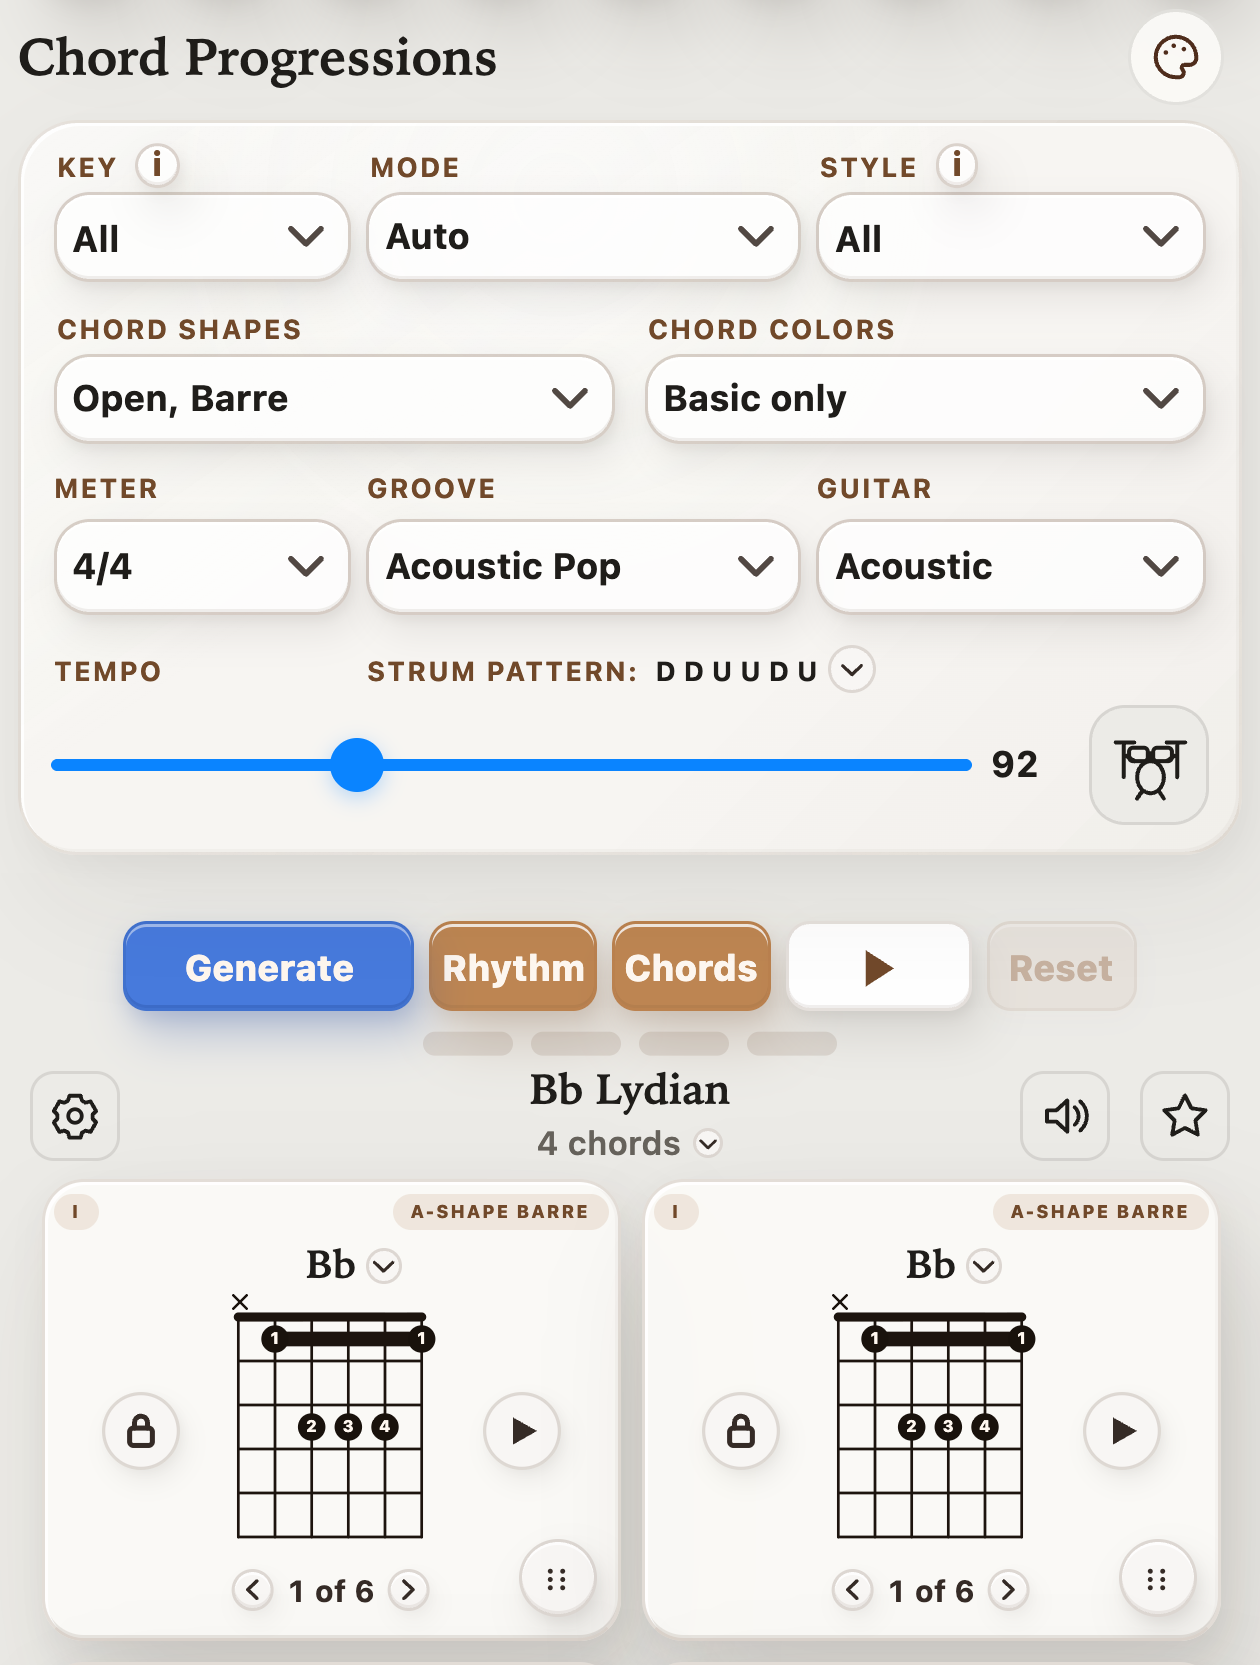
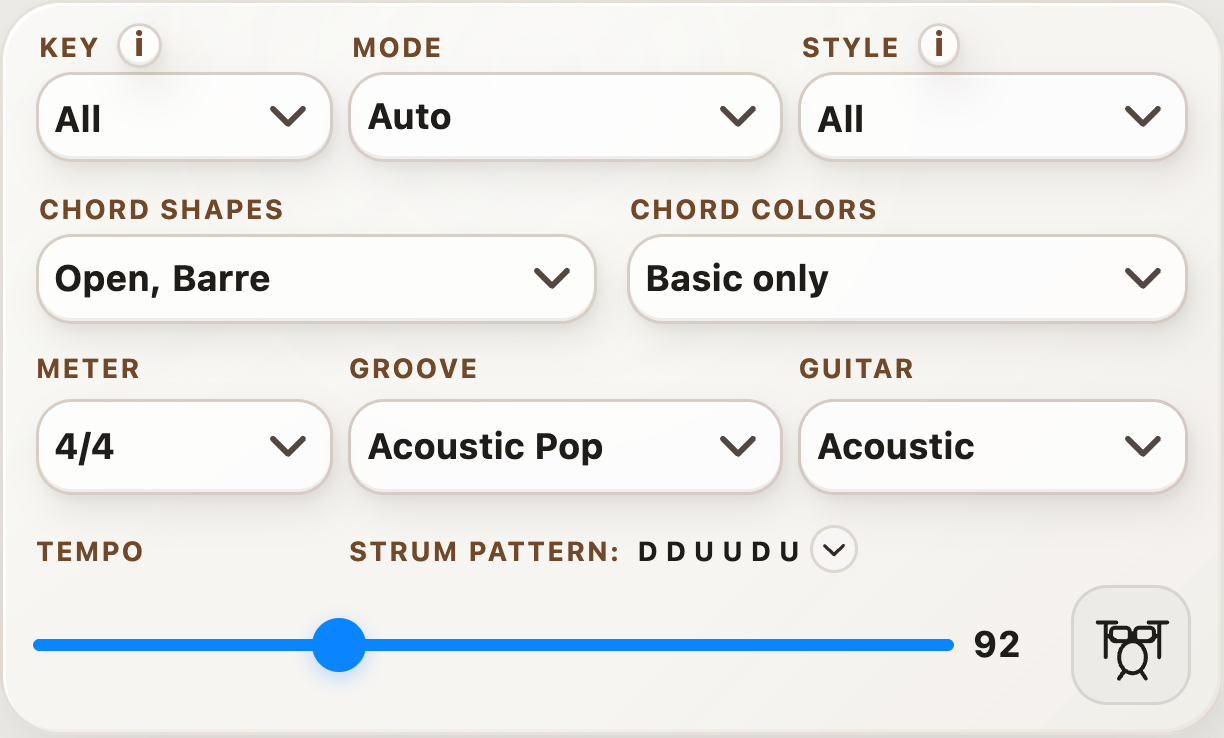
Choose the main note the progression is built around. For example, choose C to generate in a C key. Choose All to let Generate pick a key. If a key is unavailable, enable more chord shapes.
Build a progression, shape the sound, and find notes to play over it.
A chord progression is a sequence of chords. StrumForge generates progressions in a key and mode: the key gives the music a tonal home, while the mode shapes its sound. Loop the chords with guitar and drums to practice changes or develop a song idea.
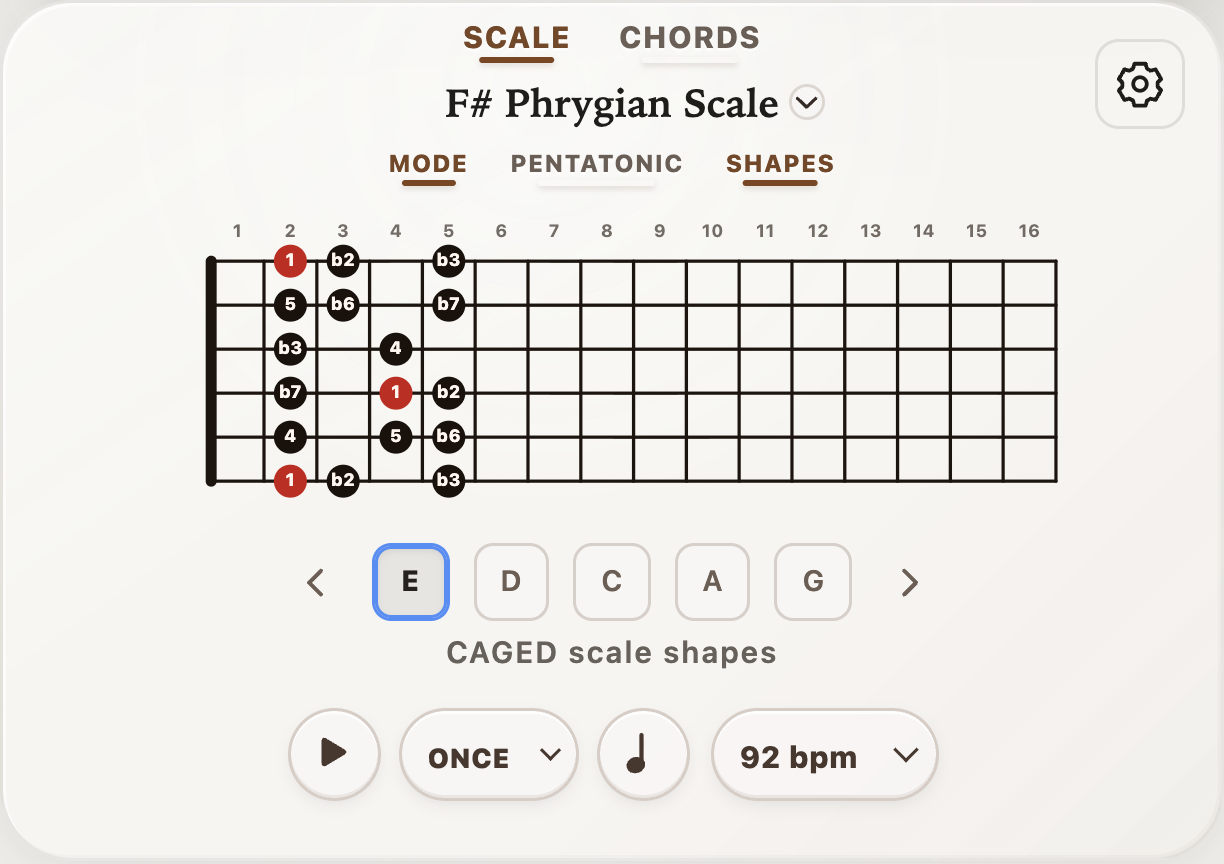
By default, the scale beneath the chord progression follows that key and mode, giving you a matching set of notes for riffs, melodies, and improvisation over the progression. For example, a C major progression is paired with the C major scale. When you are ready to try playing a melody over the progression, choose a few notes from that scale and play them while the chord loop runs. Listen to how each note sounds as the chords change. A note from the chord currently playing can make a natural place to pause or finish your melody.
Use Shapes to focus on one area of the neck, then practice with highlighted scale playback at a comfortable tempo. Choose Once, Loop, or All to hear one shape, repeat it, or move through the available shapes. Pentatonic offers a smaller, five-note scale when available. Once the pattern feels familiar, return to the chord loop and turn those notes into your own riff.
Select a number in an image to see its explanation.
Choose the main note the progression is built around. For example, choose C to generate in a C key. Choose All to let Generate pick a key. If a key is unavailable, enable more chord shapes.
Choose the type of scale used to build the progression. Ionian is major, often heard as bright; Aeolian is natural minor, often heard as darker. You can select more than one, then tap Done.
Guide the kind of progression the app generates. For example, choose a rock style for a rock-oriented starting point, or All to leave the style open.
Choose the kinds of fingerings Generate can use. For example, select Open to include chords that use open strings, or Barre for shapes that use one finger across several strings.
Add chord types beyond basic major and minor chords. For example, enable sevenths to include chords such as C7. Choose the colors you want and tap Done.
Choose how beats are grouped. For example, 4/4 counts four beats per bar, while 3/4 counts three.
Choose the drum pattern played with the chords. Try different grooves to hear how they change the feel.
Choose the recorded guitar sound used for playback, such as acoustic or electric. This changes the sound, not the chord shapes.
Set the speed in beats per minute (BPM). For example, lower the tempo when learning a difficult chord change, then increase it as you improve.
When a strum pattern is shown above the tempo slider, tap it to choose a different pattern. D means a downstroke and U means an upstroke.
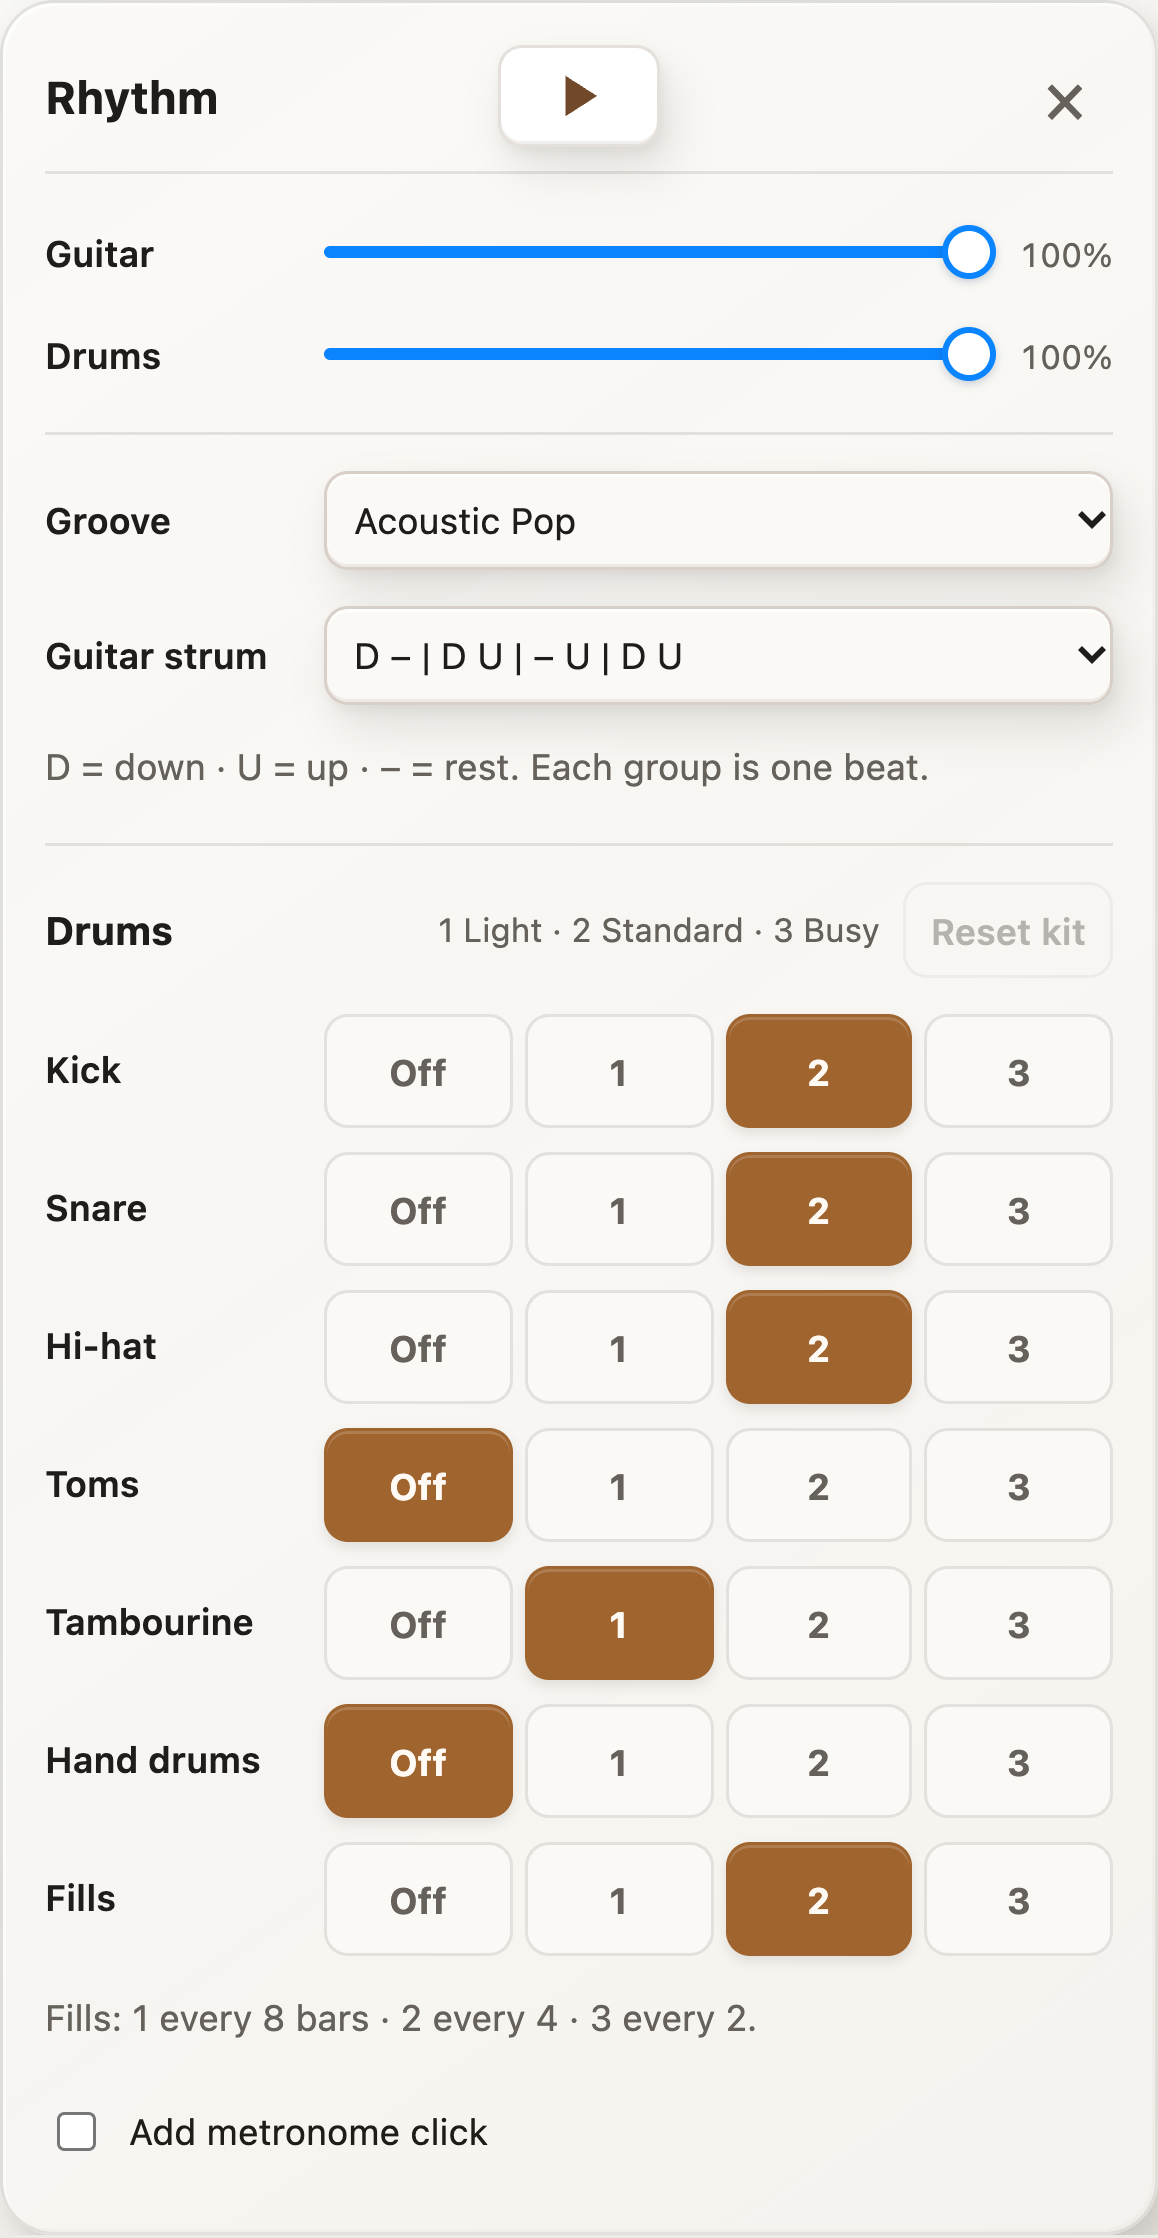
Tap the drum-kit icon next to the tempo slider to adjust the drum parts, their volumes, the guitar strum, and the metronome click.
See rhythm settingsHear the progression while adjusting the rhythm. Tap again to stop.
Move the slider to change the guitar volume. For example, turn it down to hear the drums more clearly.
Move the slider to change the drum volume independently of the guitar.
Choose a drum pattern, such as Acoustic Pop or Jazz Swing. The kit controls below can customize it.
Choose the guitar strumming pattern. D is a downstroke, U is an upstroke, and a dash is a rest.
Restore the selected groove’s original drum settings.
Choose Off, 1, 2, or 3 for the bass drum. Higher numbers make its pattern busier.
Turn the snare off or choose a light, standard, or busy pattern.
Turn the hi-hat off or choose how busy its pattern is.
Add tom drums or turn them off. Choose 1 for a lighter pattern or 3 for a busier one.
Add a tambourine pattern or turn it off.
Add hand percussion or turn it off.
Choose Off, or play a fill every 8, 4, or 2 bars with options 1, 2, or 3.
Add a steady click to the rhythm, useful when practicing timing.
Create a new sequence of chords using the selected key, mode, style, and chord options. Press it again to try another idea; locked chords stay in place when possible.
Turn the drums on or off. For example, turn Rhythm off when you want to hear only the guitar.
Turn the app’s guitar playback on or off. Turn it off to play the chords yourself while the drums continue.
Press Play to hear the whole progression repeat. Press Stop to end playback. Play along once you are comfortable with the chord changes.
Clear the current progression and recent control changes to start again.
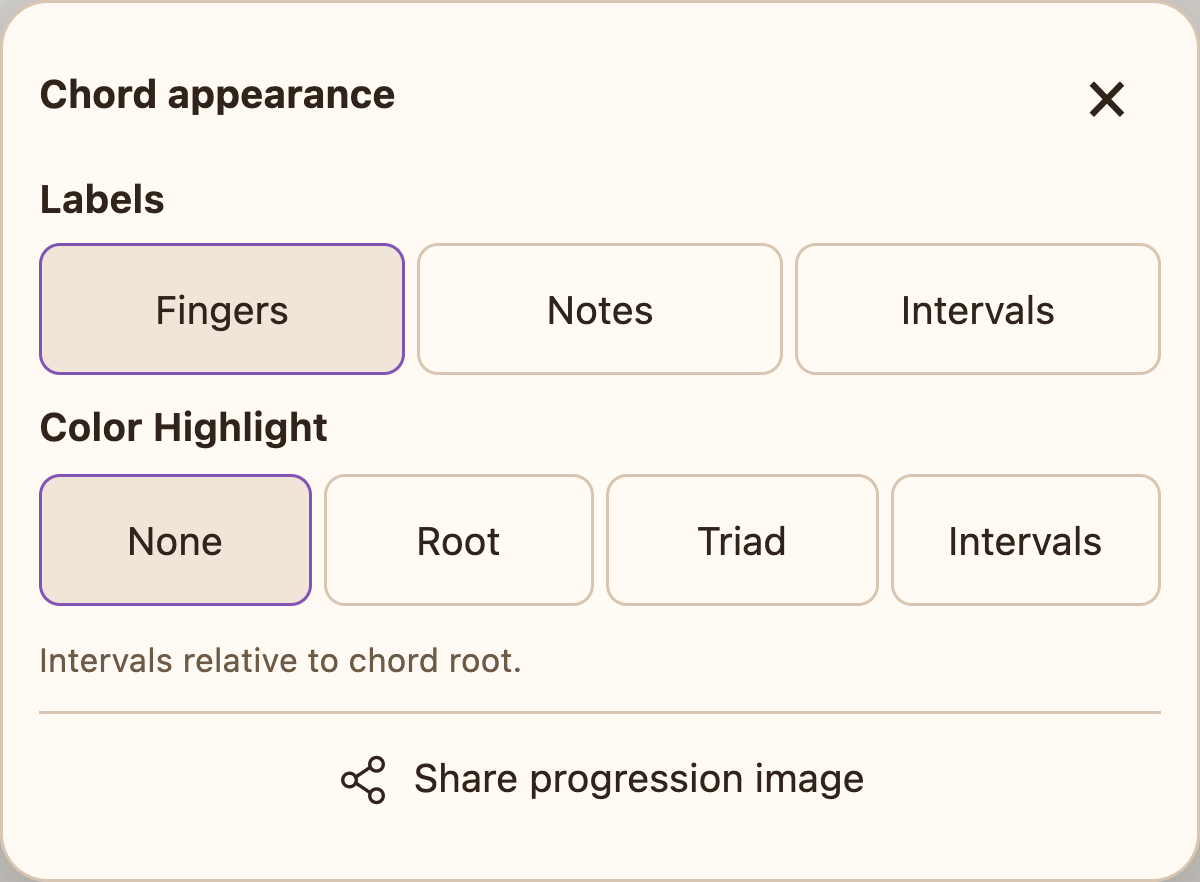
Tap the gear beside the progression title to change chord diagram labels and colors, or share an image of the progression.
See chord appearance settingsTap the chord count below the progression title to change how many chord slots are in the sequence. For longer progressions, tap a group in the overview to see its chords.
Tap the speaker by the progression title to adjust guitar and drum volume separately. Lower the guitar if you want to hear your own playing more clearly.
Tap the star to save the current progression in Favorites, so you can find it and play it again later.
Show suggested fretting fingers: 1 is index, 2 middle, 3 ring, and 4 little finger.
Show note names on chord diagrams. For example, a C major chord contains C, E, and G.
Show each note’s role relative to the chord root, such as 1, 3, and 5 in a major chord.
Use the standard diagram colors without highlighting specific chord tones.
Highlight the note that gives the chord its name, such as C in C major.
Use colors to distinguish the root, third, and fifth—the three notes of a basic chord.
Color notes by their role in the chord, including added chord tones when present.
Create an image of the progression to share or save.
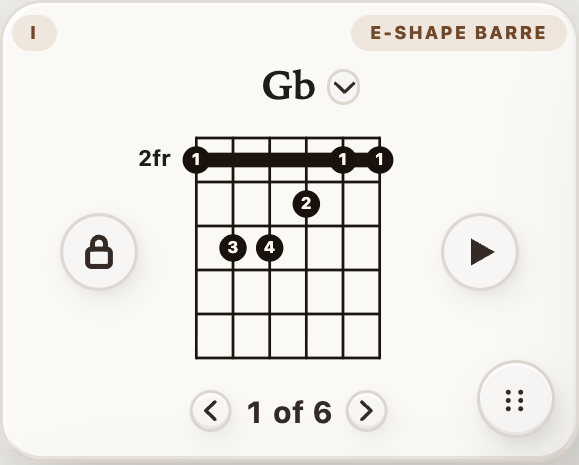
Tap the chord name above its diagram to choose a different chord for that slot. For example, replace Gb with another chord to try your own idea.
Tap a chord or scale diagram to see it larger. In the enlarged view, swipe sideways to move through the progression.
Tap the lock beside a chord to keep it in that slot when you generate again. For example, lock a chord you like, then Generate to try new chords around it. Tap again to unlock it.
Tap the play button beside the diagram to hear just that chord. Use it to check how the chord sounds before playing the whole progression.
Tap the arrows below the diagram to see another fingering for the same chord. For example, try a different shape if the first one is hard to reach or you prefer its sound.
Press and hold the dotted grip, then drag the chord to a different position. For example, move the last chord to the first slot to hear the sequence in a new order.
The Scale tab shows notes that fit the progression’s current key and mode, giving you a starting point for a melody.
Tap Chords to see the chords belonging to the current key. These are not limited to the chords in your progression.
Tap the scale name to choose a different scale for the diagram.
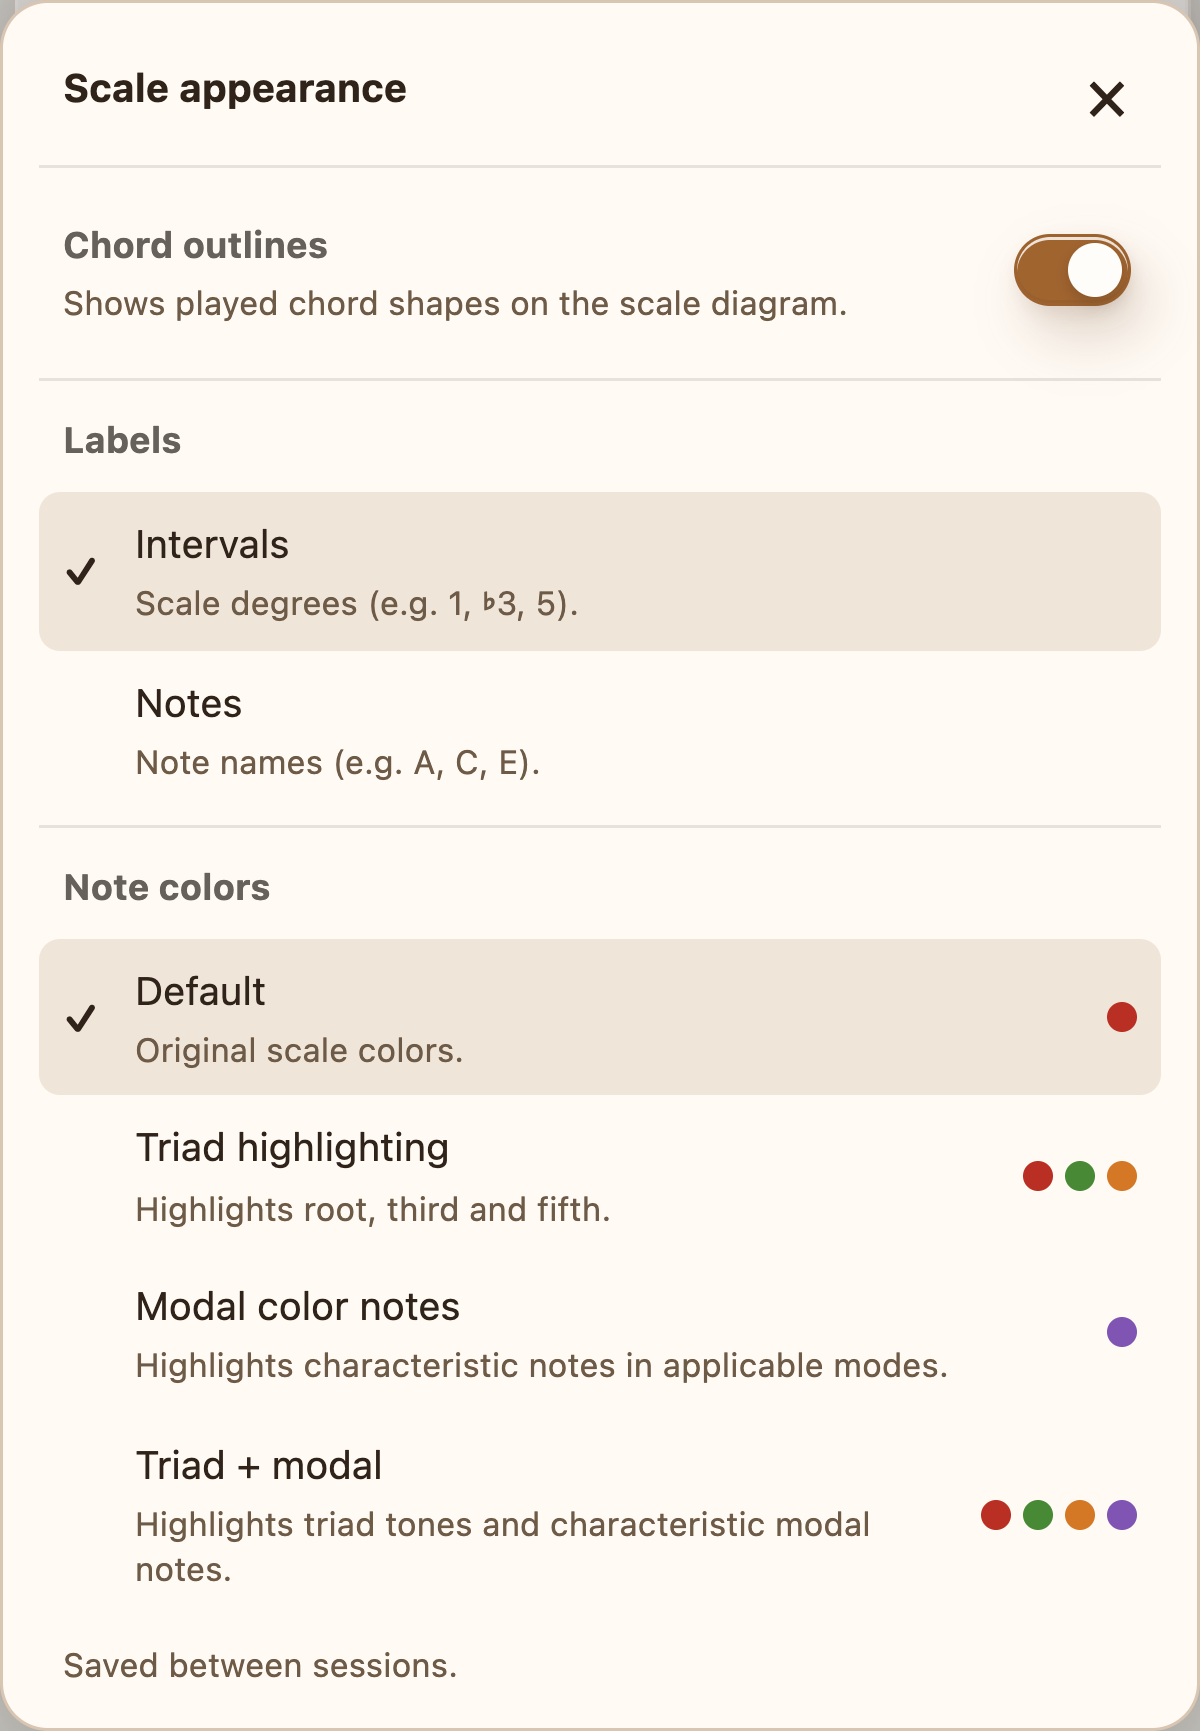
Open the settings beside the scale to change note colors and chord outlines. Choose Notes to see note names, or Intervals to see each note’s distance from the root. Chord options change chord labels and finger numbers.
See scale appearance settingsShow the full set of notes for the selected scale. For example, a major scale has seven different notes.
Show a five-note scale when available. Its smaller set of notes can be an easier starting point for a melody.
Turn Shapes on to focus on one area of the fretboard. Use the shape buttons or arrows to explore other positions.
The C, A, G, E, and D buttons select five scale patterns named after familiar chord shapes. Tap a letter or use the arrows to move the same scale to a different area of the neck; the key stays the same.
Press Play to hear the selected scale shape. Follow the highlighted notes as you play along.
Choose Once to hear the current shape once, Loop to repeat it, or All to move through the available shapes.
Tap the note button to change how quickly notes are played within each beat.
Choose the speed of scale playback in beats per minute (BPM).
Show the current chord shape on the scale diagram when a chord is played or previewed. Use it to see where chord and scale notes meet.
Show scale positions such as 1, ♭3, and 5 relative to the scale’s starting note.
Show note names such as A, C, and E on the scale diagram.
Use the standard scale colors, with the root note highlighted.
Use different colors for the root, third, and fifth, making basic chord tones easier to find.
Highlight notes that give an applicable mode its distinctive sound.
Show both the basic chord tones and the distinctive mode notes in different colors.